HOW TO COLOR WITH COLORED PENCILS
Posted by Profound Color on
Which coloring medium did you first use when you started on adult coloring? If your answer is “colored pencils,” then welcome to the one of the most thriving communities in the world of adult coloring!
Colored pencils are some of the most popular coloring mediums out there. They’re inexpensive, easy to use, and coloring with them feels like working with an old friend.
But there’s more to colored pencils than the ease and fun that they give. Once you master the colored pencil, you have in your hand one of the most versatile coloring tools out there.
Read on for some colored pencil techniques to bring out the hidden masterpiece behind each page. The best part? This covers all levels, from beginner to advanced.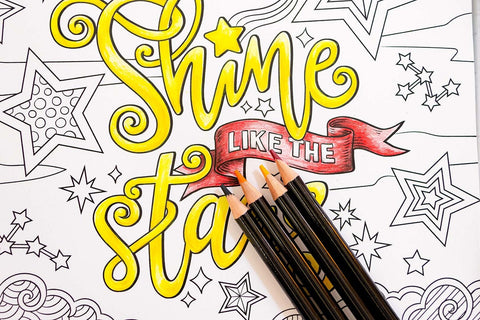
BEGINNER LEVEL
How to Sharpen Colored Pencils
As the song goes, “Let’s start from the very beginning, a very good place to start…” When we color, we begin with making sure our colored pencils are sharp. Sharp points can penetrate the tooth of the paper easily, which means a lot less of those little white streaks you see on your coloring page no matter how many times you shade an area. It also helps you keep the pressure light when you’re laying down your base. A light touch also prevents the colored tip from breaking.
So how would you go about sharpening your colored pencil? It’s easy, right? Just stick it in a sharpener and give it a good turn. But colored pencils, unlike the lead pencils of our school days, have a colored core of either wax, clay, or oil-based materials, depending on the brand and their type. This will affect how you sharpen them and even what kinds of sharpener you can use.Soft Colored Pencils
Made of wax or clay, soft colored pencils are better for those deep colors and for blending. But they’re fragile and break easily. We advise sticking to a handheld sharpener for these kinds. Here’s a trick: once you’ve stuck the pencil inside the sharpener, turn the sharpener and keep the pencil still, not the other way around.
Hard Colored Pencils
Typically made of oil-based material, these colored pencils are more like their lead-core cousins from Mongol. You can use electric sharpeners with them; you can even use an artist’s knife. If you choose the knife, make sure it’s sharp. They may be tough, but hard colored pencils can still break under pressure. The fewer whittling swipes you take at them with the knife, the better.
How to Sharpen Your Pencils by Johanna Blasford
Specialty Colored Pencils
You may have noticed in the above video that the artist turned her pencil and not the sharpener. The colored pencil she’s using is made of graphite and it’s considered a specialty type. Specialty types could also be made of chalk, and they usually have lead that’s either too big or too small to fit in your standard sharpener. An artist’s knife is typically used with these colored pencils.
How to Make Your Pencil Strokes Look Even and Smooth
Is your colored pencil sharp and ready? Then it’s time to take a look at your strokes. There are many colored pencil techniques that can help you achieve that perfectly polished end result.
3 Basic Strokes
Straight strokes. Also known as the “line,” this is the stroke that we’re all most familiar with. We just put our (sharpened) pencils and draw that line. We add another and another as closely together as possible so that those separate lines look like they’re one and the same. If your pencil is sharp and you keep the pressure light, you can use these lines to create that first layer. The line also has some popular variations:
- Hatching - This is what people first think of when they say the word “line.” Hatching is simply drawing lines side by side. The spaces in between the lines are up to you. You can draw them very close together or far apart.
- Crosshatching - This technique means drawing lines in opposite directions, but making sure they overlap. It’s great for making colors bolder and for covering large areas with color quickly.
- Back and forth - This is probably the first coloring technique most of us practiced as school kids. Just color in a continuous back-and-forth motion. It’s quick, it’s easy, and it fills up an area nicely.
Circular strokes. You guessed it. The circular stroke is all about circles. Draw small (or large, depending on what you need) circles, making sure these circles stay connected by keeping your pencil tip on the paper until you’re finished filling in an area with color. Circular strokes are great for coloring trees or shrubs or if you want to draw curly hair.
Tapping. Have you ever come across a coloring page with very intricate designs? How about illustrations with lines that seem too slender to properly fill in? Tapping is the answer. This technique is basically just making tiny marks or dots on the paper. Usually, you’d use tapping to add some accents to a colored area, but it’s also very useful when you’re coloring in some very tiny details.
How to Get Bold Colors
Do you think that colored pencils produce pale or washed-out colors? If so, you’re not alone. Colored pencils are semi-transparent, similar to watercolors. If you want to color in, say, the petals of a red rose, you’d want the color to pop out, just like the real thing. Many colorists think that colored pencils simply aren’t up to the task. They leave these kinds of jobs to the bolder gel pens or art markers.
Still, colored pencils are just as capable of producing rich, vibrant colors on paper. Here’s how to get bold colors from colored pencils.
Pressure + Pencil Type
Simply put, it’s the force with which you apply your pencil point on paper. The more pressure you add, the bolder the color you get. But, as we’ve all learned in grade school, if we apply too much pressure on our pencils, the tips could break off. We could even punch holes through the paper.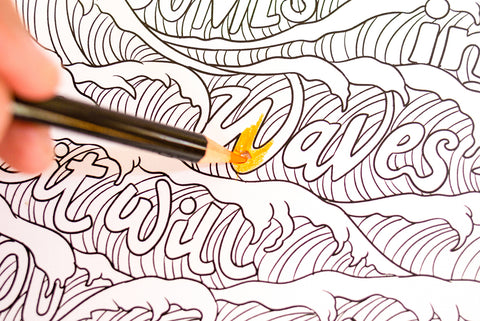
This leads us to the next half of the combo: the pencil type. As we’ve mentioned before, soft colored pencils produce deeper colors and are favored for layering. If your goal is to get rich colors with less effort, it’s best to choose soft colored pencils for your art.
But don’t write off hard pencils just yet. Some colorists are just more naturally heavy handed. Embrace that as part of your style and simply adjust the technique to suit you. With a hard pencil, just ease up on the pressure, make sure the tips are as sharp as they could get, and layer!
Layer
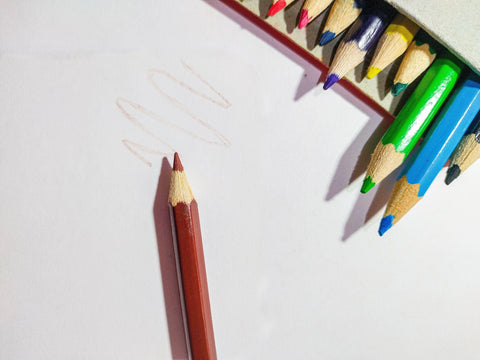
We hear the word layering a lot, no matter which coloring medium we use. For those who may be new to adult coloring in general, layering is simply applying and reapplying the same color until it’s thick and solid. Yes, this may be time consuming, but the beauty that results from that focus and determination is guaranteed worth it.
Paper Quality
When you think of coloring tools, what comes to mind? Colored pencils, check. Sharpeners, check. And, of course, adult coloring books with amazing drawings to get your creative juices flowing.
What about paper?
We don’t often think of the paper we work with, but they matter as much as any other type of tools we use. Artist-grade, white paper is often better when working with colored pencils because of the semi-translucent quality of the pencils. If you use colored or tinted paper and you don’t layer enough, the color of the paper will show through the layers of colored pencil and affect the final result. Artist-grade paper is also important because it’s designed to take pressure and the different substances that come from coloring mediums.
There you go, the basics of coloring with colored pencils for beginners. Curious what we’ll do next? Read on to find out.
INTERMEDIATE LEVEL
What Is Blending and Why Should You Do It?
Welcome to the next stage of your adult coloring adventure. You’ve chosen the perfect coloring pencils for you, know how to care for and maintain their quality, and just how to use them to color in those pretty new adult coloring books you’ve been gathering.
Now, you’re probably thinking, “What’s next?” Well, now you explore how to blend colored pencils.
You’ve done this already, even without giving it too much thought. Blending means mixing together two or more colors to gradually bring out a different shade of the color or a different color entirely. The basics of blending are found in the strokes, in crosshatching, in particular.
Isn’t the hobby of coloring so dynamic? There’s always something new and fun to try.
Blending vs. Layering
So what’s the difference between blending and layering?
You do layering at the beginning of your project, and you only use colored pencils (or whichever tool it is you’re using) only.
Blending is close to the last stage of your project, and you can use several other tools for it too.
Artists use blending to bring out the subtleties of a drawing. It can provide the illusion of depth or the fall of light and shadow on the image.
And if you haven’t already, please check out an article we posted about this topic, How to Blend and Shade with Colored Pencils for Adult Coloring Books. This is an excellent source for a lot of basic blending tips. It works well for beginners and for intermediate-level colorists.
Blend in the Opposite Direction
The above article has explained several useful blending techniques. In this article, we’re going to give you one simple tip that’s often overlooked: go the opposite way.
Most Important Tip for Blending Colored Pencil by Kirsty Partridge Art
As you can see in the video above, the artist has placed her first layer of color in one direction using lines or straight strokes. She blended to give a more polished value to that first color by coloring in circular strokes, going in the opposite direction.
Blend with Multiple Colors
Do you know what other fascinating results you can gain from blending? You can produce “transition” colors, or new colors you can get by mixing together two different colors. For example, mix blue and yellow and you’ll get the transition color of green.
How to Blend Colored Pencils by Posh Coloring Studio
Wasn’t that a nice video? Let’s break down the tips Posh Coloring Studio has shared for how to blend colored pencils:
- Begin with light layers, keeping the pressure light.
- Layer your second color with similar light pressure, overlapping with your first color. Apply your third color in the exact same way.
- Whatever stroke you use with your base layer (straight, circular, or back and forth), stay consistent.
How to Add the Burnishing Touch
As mentioned in the article How to Blend and Shade with Colored Pencils for Adult Coloring Books, burnishing is that final stage, that part of coloring where you fix everything in place.
So how do you burnish your coloring page? Burnishing means you layer and you blend until nothing of the paper shows through the color. Remember those stubborn white bits of paper that keep popping up through your coloring layers? They’re collectively called “paper tooth.” Burnishing is meant to push them down until they just don’t show up anymore. By the time you’ve completed your burnishing, all you will see are the layers of color that bring your art to life.
Check out Burnishing (Colored Pencil Technique) by Jonathan Henricksen. It’s a short but straightforward video.
The artist in the video lays on the pressure and uses the circular strokes to mix the two layers of colors together, mashing down on the paper tooth. He uses burnishing pencils to do so, the colorless burnishing pencil and the white burnishing pencil. Additionally, if you have no burnishing pencils, you can always use the lighter colored pencil of the colors that you’ve layered as a burnish.
The video artist made burnishing look easy, and it is! Here’s a breakdown of the video’s pointers:
a.) Firstly, layer on all the colors you want to use. The burnishing is the final step, so you’ll want to get the layering and blending completed before you burnish. Make sure all the colors you want to see are showing. Remember our transition color example, green? Well, don’t stop layering and blending your blues and yellows until you see green shining through. Layer and blend until the colors you want to see are showing.
b.) Next, choose your burnishing tool. The video shows that you can use any burnishing pencil, depending on the look you’re going for. Still, we advise that you begin with the white pencil, just in case you feel that you want to add more layering. As you can see in the video, the artist demonstrated adding more layers to the side that he burnished with a white pencil. Don’t be afraid to push down hard this time. The burnishing is the part where you put the pressure on to really mix the layers of color together. It’ll also ensure that those pesky paper teeth won’t bite anymore.
c.) After you’ve used your burnishing pencil, check the artwork. Are any paper teeth still showing? Don’t worry, you can continue layering on top of the burnished product. Layer following the same sequence that you did before. For example, in the video, the artist layered a yellow color first, followed by the red. Should you need to re-layer, start with the yellow again and so on and so forth.
d.) Are all the paper teeth gone? When you can see that no paper shows through your artwork, it’s time to whip out that colorless blender pencil. White mixes color well, and pushes down paper teeth without white itself standing out, but the colorless pencil is what you need as the final touch. All the layers are blended well without bringing any other transition color into the mix. Plus, the colorless pencil magnifies the intensity of your colors, which results in a brighter, livelier polish.
And there you have it: a beautiful, polished work of art crafted from colored pencils.
ADVANCED LEVEL
There are still more fun colored pencil techniques to master now that you’ve reached the advanced level. When you’ve earned your way to this level, you also become more adventurous with your coloring tools. Read on to find out just what else you can use with colored pencils and marvel at the potential results.
How to Use Colored Pencils with Solvents
Love of color can improve creativity and resourcefulness. It’s no surprise that colorists figured out that solvents can work as blenders. Solvents are substances that thin out or dissolve other substances. Defined that way, they’re actually the opposite of coloring. So why have solvents become so popular? Here are a few pros for using solvents to blend colored pencils.
-
Using solvents means less pressure. Solvents are applied gently, and on the first application, you see it blending the layer so that the tooth of the paper no longer shows.
-
Solvents give colored pencil art the look of paint. Yes, burnishing can result in artwork so smooth, you’d think it was done with paint, but solvents can get those results for you in less time.
- Solvents have a matte finish. If you’re looking for a more even, realistic look rather than the glowing, shining result of burnishing, solvents are better for you.
How to Apply Solvents
- After you’ve applied all your layers, dip a brush in a very small amount of solvent (popular choices are Gamsol and Zest It Pencil Blend). Simply brush that solvent over your layers. Be very gentle while brushing.
- Solvent allows you to continue layering after it dries. Please don’t apply more layers while the solvent is still wet as the colors might run.
- The more layers you apply, the less solvent you should use to blend them in afterward.
Check out this informative video, 4 Ways to Blend Coloured Pencils by Kirsty Partridge Art. The artist demonstrates how to blend colored pencils, which includes the use of pencil blenders and burnishing. If you’d like to skip those and focus on solvents, please forward the video to the 4:00 minute mark.
Solvents are effective blenders, but you need to be careful when using them because they’re often toxic. If you want to try them out, go for nontoxic ones. Or if you’re already using a strong solvent that could be toxic in large doses, please make sure to use them in a well-ventilated room. And always remember that with solvents, a little goes a long way.
How to Mix Colored Pencils with Other Coloring Mediums
Have you ever wanted to try colored pencils with markers? How about colored pencils and gel pens? Mixing your media can give you colors with more depth and substance. You can achieve astonishingly realistic results by mixing your coloring media. Just look at this video by The Virtual Instructor.
Wasn’t the artwork in that video fantastic? By the time the artist is finished, you can almost hear the ice clinking inside the glass. If you want to achieve results like these, mixed-media coloring is the next stage you should master!
Blending colored pencils with markers is basically about using the markers for your first layers and the colored pencils to complete your detailing.
- Apply your first layers with markers. Markers go first because they produce bold colors, and when you’re mixing them with colored pencils, your pencil effects could get drowned in all that boldness. With markers, the back-and-forth stroke or the line stroke is ideal for that seamless look.
- Do you need to add more layers? Feel free to do so, but make sure that the layer you applied first has dried before adding another. Otherwise, the colors might run instead of mix. This is especially important if you use alcohol-based markers.
- Have you applied all the layers and colors you need to with markers? Great, now just wait for a bit until the markers have dried completely. Only then should you apply the colored pencils. This part can get a bit tricky. You want your colored pencil detailing to stand out, but markers produce bold colors. So how do you make sure your colored pencils pop?
Choose a similar color to the marker layer that you want to accent with colored pencils, but pick a shade darker. For example, you applied a pink marker layer. What would be a similar but darker color to that? You probably have darker shades of pink in your colored pencil collection already, but if you don’t, you can go for red or purple.
If you also want to layer with your colored pencils, you can. The usual rules of layering apply: begin with the lighter colors. Just make sure that even when you’re using light-colored pencils, their colors are still darker compared to those of the markers.
Here’s a quick and enjoyable video demonstration, Colored Pencil Shading over Marker Demo, by Outside the Lines.
And there you go, colored pencil artwork made even more beautiful and realistic with the use of other media. Feel free to experiment with combining other tools. Your greatest artwork might come from that perfect combination!
How to Color Skin Tone with Colored Pencils
We’re happy to see you’ve accompanied us this far. After all the videos and the tips that you’ve seen in this article, you’re probably eager to grab your colored pencils and get to work on your next masterpiece.
Have you ever tried coloring skin tone? You probably have. Many advanced-level colorists take on this challenge because, when done right, coloring skin tone is one of the most rewarding artworks there is. If you haven’t tried it yet, then you’re in for a treat. Here’s an interesting video, Drawing Skin with Only 5 Colored Pencils, by Kirsty Partridge Art to get you started.
Helpful Tips for Coloring Skin:
- Study up. We’ve covered layering and blending, and for coloring skin, these two techniques will be your best friends. With the right combination of these two techniques, your artwork won’t look flat or one-dimensional.
- Choose your colors. As the video has suggested, it’s advisable for you to limit the colors you’ll be using when you’re coloring skin tone. Ask yourself, “Is the skin tone light, medium, or dark?” And gather the right colors for that.
- Undertone. Ever wonder why some colors look great on you and some you’re better off avoiding? The secret is “undertone.” Undertone refers to the natural colors under the surface of your skin. This is what fashion lovers and makeup enthusiasts pay attention to when choosing clothes and makeup. Look closer at the skin tone you’re trying to bring out. Does the skin tone you want to recreate with colored pencils have pink undertones? Or is it more olive or golden?
- Highlights. Don’t we all love a bit of sunbathing? Imagine how human skin looks as the sunlight touches it. That lightened area is what’s referred to as highlights. In coloring, highlights can be achieved with the lightest shade of the color you’re using for the skin tone. Or, if the skin tone you’re coloring is light, you can simply leave it white. The whites of the paper can serve as highlights when they’re surrounded by color.
Interested in seeing examples of what beautifully colored skin tone can do for your artwork? Check out our wonderful video, How to Color Skin Tones with ColorIt Mediums. This may not have been done with colored pencils, but as a colorist, feel free to mix and experiment with different mediums. Free your creativity!
How to Protect Your Artwork
After all your hard work, you’ve produced a thing of beauty. If you’re worried about how easily it can get damaged—colored pencil artwork is typically done on paper only—then here are some ways you can protect your artwork.
- Keep your artwork away from the sun. Yep, UV light damages just about everything it’s exposed to for a long enough period, so display your finished pieces away from direct sunlight.
- Use a fixative. After all media on your artwork is dry, spray on a permanent sealer spray over it from two feet away. Spray in a consistent pattern, from left to right and then top to bottom for full and even coverage. It’s best to spray outdoors to keep any odors or fumes from irritating you. Let it dry for around 20 minutes to an hour before handling.
- Frame your artwork. Did you know you can frame your own art by yourself? One of the beautiful things about creating art from adult coloring books is that it comes in standardized paper size that can match pretty much any picture frame you can buy at the mall. Thank goodness for that because custom framing can be expensive.
Check out these helpful videos that you can refer to for framing your artwork without spending a pretty penny.
How to Frame Your Art by 20x200vids, and Jerry’s Artarama’s Artist Problems - Framing on a Budget.
These are just several of the most common ways to protect your artwork. Of course, protecting your artwork is your choice, and you may have a preferred method already. Trust your experience.
FINAL THOUGHTS
Colored pencils have come a long way since they were thought of as for-kids only. Many colorists and artists have proven just how beautiful colored-pencil artwork can be. They’re worth your time and effort. We hope that the tips and tricks we’ve shared inspire you to try colored pencils. Or if you’ve already discovered how wonderful colored pencils are, then give our tips and tricks a try. They can help you improve your craft.
Do you know of any special tricks that enhance your colored pencil craft? Share it with us in the comments below. To get more coloring tips and tricks, subscribe to our newsletter.
Share this post
- 6 comments
- Tags: adult coloring, adult coloring books, adult coloring pages, colored pencils, Gel Pens, markers
6 comments



I’m so excited!! I’ve waited so long for your pencils to come back ❤️