How To Blend and Shade With Colored Pencils For Adult Coloring Books
Posted by ColorIt Support on
Are you blending and shading with your colored pencils the right way?
Lots of people sleep on colored pencils for art because they apparently find this medium quite challenging, especially when blending and shading.
But is that really the case?
Not quite!
The truth is that colored pencils are pretty easy to use. With the right techniques for blending and shading, you can actually make your coloring pages come to life with this nifty medium!
We’ve got some useful tips and tricks on how to use colored pencils the right way, so if you need to up your game, read on!
What Makes Colored Pencils Different From A Normal Pencil?
Here’s the trick to mastering any art technique: know what you’re working with first. This applies to every coloring medium out there, whether it’s gel pens, markers, watercolor brush pens or in this case, colored pencils.
Colored pencils are not your run-of-the-mill school supplies. This drawing medium doesn’t use the usual graphite found in ordinary writing pencils. Instead, colored pencils have an oil- or wax-based core and use a combination of pigments and binders to produce color. The proportion and combination of these materials ultimately determine the quality of the pencil.
As a rule, you should always go for colored pencils with buttery-soft wax cores. These pencils can be found in many art supply stores and come in a wide variety of colors. Wax-based colored pencils lay pigments really well on paper and are relatively easier to work with compared to their oil-based cousins. They’re quite affordable, too.
On the flipside, stay away from pencils that have more binders than pigments as they tend to be “hard” and have patchy strokes.
Basic Tips When Using Colored Pencils
You don’t need a lot of preparation when using colored pencils for art. All you need to have are your pencils, a handy sharpener, and a few good tips like these to maximize the experience:
Sharpening Your Colored Pencils

Dull pencils are a chore to work with, so before you begin coloring, make sure you that your pencils are nice and sharp!
Blunt pencil points prevent you from laying pigments properly on the page--- the colors just don’t come out right. They’re also not good for doing small details. Sharp pencils, on the other hand, produce better pigments and bolder colors because they can penetrate between the tiny grooves found on the paper’s surface.
Some people like to sharpen manually to avoid wasting pigment but electric sharpeners also work great for a more consistent point. Just make sure not to use dull sharpeners! They could damage the pencil, break the core and even chip away at the wood casing.
Using The Right Paper
Like all other art mediums, you can truly bring out the best qualities of colored pencils when you use high-quality paper. Skip your ordinary copy paper--- they’re not ideal for this type of medium because their fibers tend to get flattened by the coloring motion. Instead, go for paper that’s nice, thick and able to accept pigments well.
Colored pencils also use materials and substances like paper towels, alcohol and solvents for blending, so don't settle for less and make sure that the paper is thick enough to handle some stress and moisture.
Useful Tips and Techniques For Blending and Shading With Colored Pencils
Now that you’ve got the basics covered, it’s time to have some fun! Here are some useful blending and shading tips:
Reducing Finger Fatigue and Creating Textures
Holding a pencil may seem like a no-brainer to most folks, but did you know that it can significantly affect your artwork and even your health?
Colored pencils are quite thin, so people tend to put unnecessary pressure on their wrists and fingers to gain more control and dexterity. This leads to pain and discomfort.
Thankfully there’s a quick trick to lessen finger fatigue. In the video above, our resident artist Debbie demonstrates how to hold your colored pencils properly.
Gripping the pencils farther from its base allows for wider coverage, lighter strokes, and a more relaxed hold. This should be the general position of your hand when coloring. You want to start lightly first, and then slowly build the colors.
Gripping the pencil closer to the base is great if you want bolder strokes and more control. However, you should only use this method when you’re working with details and intricate designs
Further along the tutorial, you’ll also see some nifty techniques on how to create textures and depth. This is especially useful when you’re coloring fluffy characters like the cute snow dogs from our coloring book Dogs, Everyone’s Best Friend.
Go In Different Directions
Kids are often told to color in one direction to keep things pretty but that’s not the case when it comes to colored pencils.
Coloring in one direction is a faster way to do things, sure, but this method leads to streaky lines and uneven distribution of pigment. Your strokes will ultimately appear broken and awkward when they meet in different areas, so mix things up and color in different directions instead.
The most common way to do this is to create circular strokes, especially when you’re still laying down your base color. This technique helps you distribute the color more evenly.
Other techniques, like coloring in the opposite direction of your initial strokes and crosshatching, also allows the pigment to penetrate between the paper’s tiny grooves and dips (also called the tooth of the paper) better.
Pressure Shading
Pressure shading is one of the easiest ways to add depth and dimension to your works. It’s so easy that even beginners can master it in no time!
Pressure shading is when you produce different shades by simply changing the amount of pressure you apply on the pencil. Light pressure will obviously produce light shades while heavy pressure will give you darker shades. Practice swatching a light-to-dark gradient and vice versa and then when you’re ready, apply it to your artwork.
The amount of pressure you put will also depend on the sharpness of your pencil. If your pencil is sharp, you don’t need to put as much pressure as you would on a dull pencil. Make sure to always keep your pencils on point to save your hands from fatigue.
Don’t forget your lighting when pressure shading! The areas that get hit by the light source are brighter; areas away from the light source should be darker. Light studies are a bit tricky at first, but just keep at it. You’ll see that your artworks will take on more depth and dimension once you’ve mastered this skill.
Burnishing
Once you’ve picked the right colors and have laid down your strokes, it’s time to make things permanent by burnishing.
Burnishing means applying and blending your color pencils to the page until you’ve covered all the white spaces with pigment. It’s like using the paper to its max capacity--- when you’re burnishing, all of the paper’s tiny grooves, nooks and crannies are filled so you’re left with a nice, smooth and waxy surface.
Remember: you can’t add more pigment once you’ve burnished the paper, so it’s important to choose your color combinations wisely.
Pick out the colors you’d like to use as your base, and then choose your highlight and shadow colors. Take your time and build those colors slowly but surely. If you add too much pigment too soon, you may accidentally end up burnishing your page, so be patient. Work from light to dark so that you can correct any mistakes along the way. Continue coloring until you reach that smooth, burnished effect. From there, you can then use dry and wet blending methods (discussed later) to finish your artwork.
Using Different Colors For Blending
The awesome thing about colored pencils is that you can mix and match various color combinations and still end up with a visually pleasing output. Just check out the video above--- who knew that a simple apple can have so many color layers?
With colored pencils, you can play around with unconventional color combinations and layers to create a more striking effect. This is great for creating still life and realism, but you can also apply it to your coloring book pages. Pick out a good color combination for your midtones, highlights, and shadows and don’t be afraid to experiment. You’ll be surprised by the results!
Blending Using Dry and Wet Materials
Colored pencils work great on their own, but did you know that you can also blend them just like pastels or watercolors?
To blend colored pencils, you’d need the help of a few blending materials and substances. Don’t worry, you don’t have to spend a small fortune just to get a smooth transition since most of these materials can be found at home. If you’re ready, here are two techniques on how to blend colored pencils:
Dry Blending
For the dry method, you can use simple paper towels to gently smudge the area and blend the pigments together. Use the smooth side of the paper towel for light blends and the rougher side for more heavy-duty blending. You can also use toilet paper and cotton pads to do the job.
If you want to use a colorless blender, go for it. Colorless blenders are basically pencils without any pigment, so you can use it to blend and burnish wax-based pencils.
The smoothness of the colors depends on the type of blender you're using. Some colorless blenders leave the colors with a more subdued, less opaque effect, while others don’t affect the colors’ opacity at all. If you’re a little short on cash, you can always use a dollar store white pencil (they tend to have more binders than actual pigments) to stand in as your blender.
Wet Blending
 Wet blending uses substances that break down the pigments on the page. Once the pigments are broken down, they can move around and blend with each other smoothly.
Blending substances include household items like baby oil, lighter fluid and rubbing alcohol. You can also use solvents and mineral spirits.
This is the usual process for wet blending:
First, make sure that you’ve got enough pigment on the paper or coloring page. Then, dab a small amount of your blender of choice onto the page using a brush. Lastly, blend your colors together. A little goes a long way, so be careful not to use too much or you’ll end up damaging your paper.
Take extra care when using flammable materials like lighter fluid, solvents and mineral spirits. Use them in a well-ventilated area, away from open flame and from curious kids!
Bonus Colored Pencil Tutorials!
Of course, colored pencil techniques don’t end with blending and shading. Here are a few bonus tutorials to take your colored pencil skills to the next level:
Experiment With Paper
We’ve talked about importance of using the right kind of paper earlier in this article. Why don’t you take it up a notch and use colored paper for your next artwork? Colored paper instantly gives your artworks a dramatic and more striking look--- just like the owls on the video above.
Coloring Skin And Warm Tones
Whatever medium you’re using, coloring skin tones will always be a challenge. This tutorial will help you choose the right colors to achieve that perfect skin shade and texture. Remember, going slow and steady is the trick to mastering colored pencils, so just be patient and take your time.
Avoid These Colored Pencil Mistakes
Everyone makes mistakes, especially when using a new medium like colored pencils. Thankfully, you don’t have to fumble around. This video already points out the most common colored pencil blunders--- all you have to do is do your best to avoid them!
Final Thoughts
Contrary to popular belief, colored pencils are easy to use. With the right shading and blending techniques, you can create stunning artworks with this versatile coloring medium. Just remember that coloring with pencils takes a bit of patience. Don’t expect to get a perfect look from the get-go. Instead, take your time and enjoy the ride. With patience and skill, you can create so many wonderful designs with your colored pencils.
Did you find this article helpful? Drop a comment below to and let us know what you think! Don’t forget to share this to your coloring buddies, too!
Share this post
- 7 comments
- Tags: coloring tips
7 comments


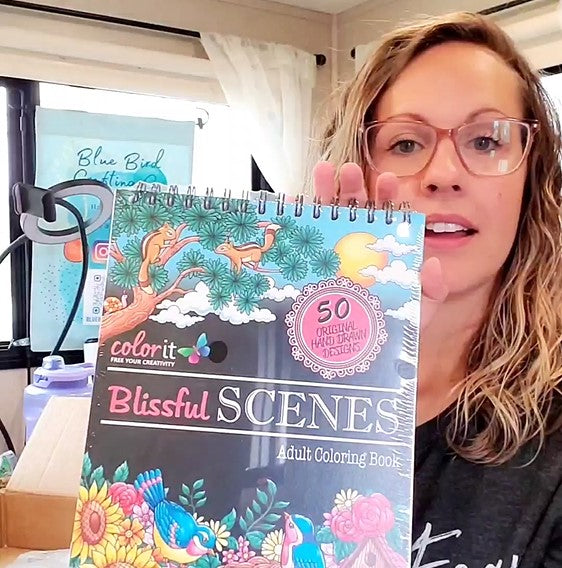


I appreciate the great quality of all Color It products, the best l have found. I really enjoy coloring and have a request: grayscale coloring pages. I would really like to have your fine quality grayscale coloring book to enjoy that technique. Especially a variety of subjects. My favorite books Blissful Scenes. The videos and coloring techniques on this web site are really great.
Really enjoyed the instruction,they have really improved my coloring